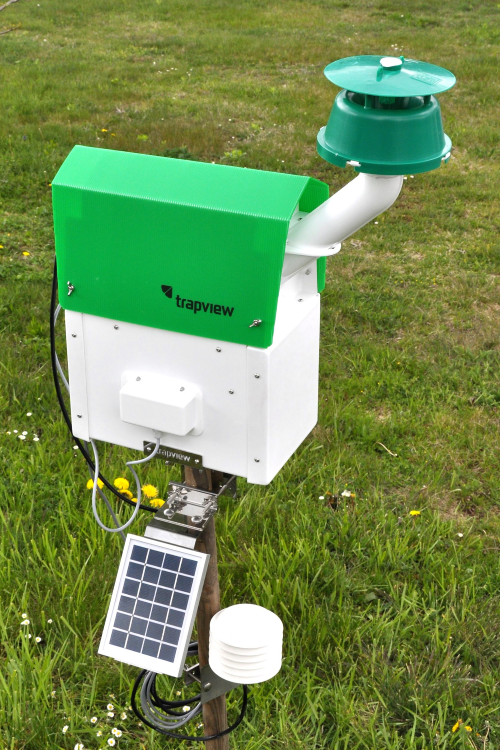
Trapview with self-cleaning mechanism, funnel entrance
Pests are lured into device and stick to a sticky roll tensed between two axes. When sticky surface is saturated, simple command through Trapview application will trigger cleaning of sticky surface by winding of sticky roll.
There is the video tutorial of how to assemble the Self-cleaning, funnel entrance.
All components
1 Electronics/device

2 Solar panel with holder

3 Motor plate / plastic part no. 0 with motor

4 TRh sensor (optional)

5 Plastic parts for self-cleaning box

6 Sticky roll with winding and unwinding axels

7 Plastic parts for electronics holder/insect entrance
8 Funnel parts

9 Green housing/roof

10 Holder for self-cleaning mechanism
11 Connecting bracket for solar panel fixation

12 Mounting material


How to assemble the trap
SELF-CLEANING BOX
1 Prepare plastic parts from 0 to 4, hex key and 10 button head socket screws.

2 Merge plastic parts no. 0-2 by using 4 button head socket screws.

3 Add bottom part (no.3) and fix it with 4 button head socket screws (from bottom side up).


4 Add part no. 4, screw it on the inner side of plastic part no. 0 by using 2 button head socket screws (screwed from outside in).


5 Prepare plastic part no. 5, sticky roll with rolling axles, 1 button head socket screw and 4 wing screws.

6 Fix axle for unrolling (the one that is holding clean sticky paper) on the inner side of plastic part no. 0 by using button head socket screw – fix it in the position as shown on image, screw it from outside in.

7 Install the sticky stripe between both axles (the second axle has to be mounted on the motor shaft – turn it slightly to slip on).

Sticky stripe has to be tensed over the plastic part no. 4 with sticky surface facing outside.

8 Close the self-cleaning box with plastic part no. 5 using 4 wing screws.
Please pay attention that plastic part no. 4 sits properly on the bump on the plastic part no. 5.

ELECTRONICS HOLDER AND INSECT ENTRANCE PARTS
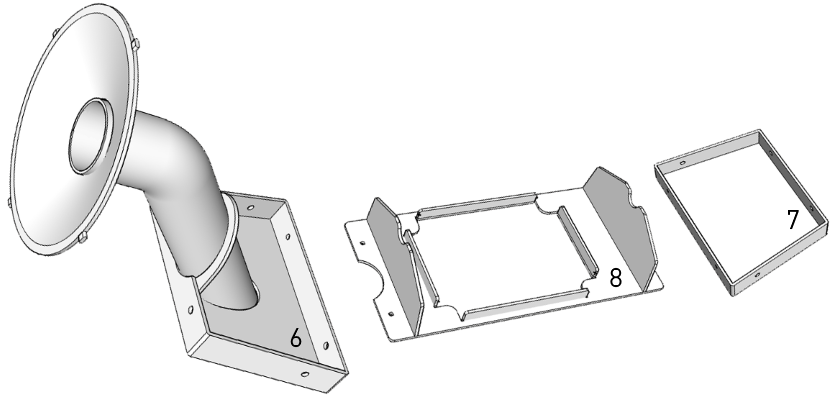
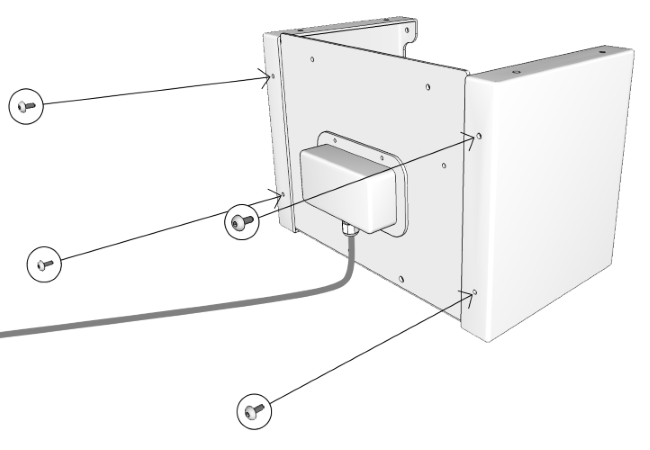
9 Prepare plastic parts no. 6-8 for mounting electronics holder, self-cleaning box and 8 button head socket screws.

10 Join plastic parts no. 6-8 by using 4 button head socket screws.


11 Affix the electronics holder on the self-cleaning box.
Plastic part no. 8 is not symmetric - it must be placed in a way that the funnel is on the same side as the axle holding the clean sticky paper (the upper one of the two).

Join the electronics holder with self-cleaning box with 4 button head socket screws.

12 Take self-cleaning box with electronics holder and prepare electronics, green housing/roof and 4 wing screws.

13 Unscrew glass cover from electronics housing, insert SIM card and turn the device ON (ON/OFF switch) and fix glass cover back on electronics housing.

If you can’t or don’t want to wait till the next day to see the first data sent from your device, you can start it by following the manuals in chapter How to start device.
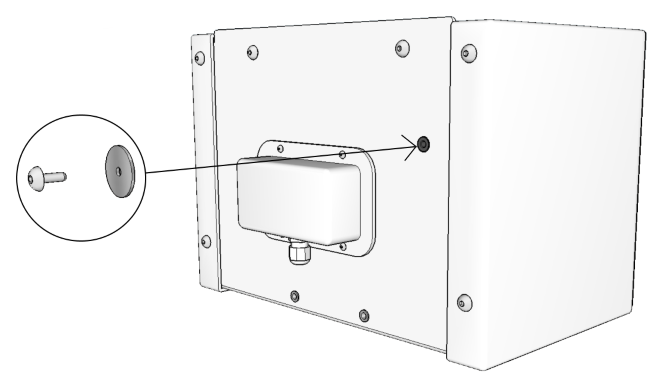
14 Insert the electronics in the holder.

If your electronics has a connector for connection of external antenna, you have to connect it, otherwise the device will not work. You will find connection and installation instructions in chapter Antenna.
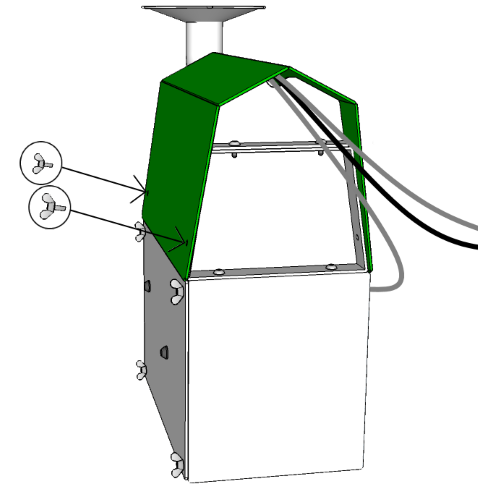
15 Fix the green housing/roof with 4 wing screws.

16 Prepare funnel parts (lid and funnel) and assemble them together, then fix the funnel part on the funnel tube of plastic part no. 6.

17 Put the pheromone into cage and close the cage with the cap and insert it into opening in lid.


INSTALLATION ON THE POLE
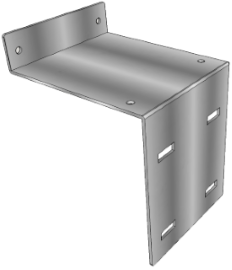
18 For installation of self-cleaning unit on the pole prepare the metal holder, connecting bracket and the remaining mounting material.
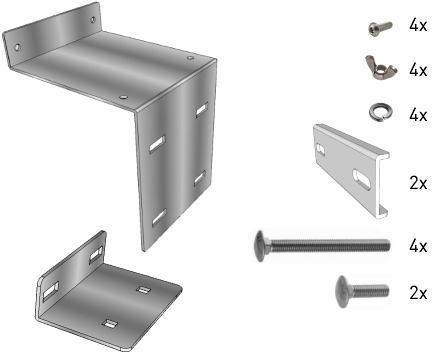
19 Fix the metal holder on the bottom of self-cleaning unit with 4 button head socket screws.

20 Place all other screws, nuts, lock washers, U-profiles as on the image to fix self cleaning unit to the pole (push mushroom head squared neck bolts through the opening in metal holder, attach the U-profile, add lock washer and wing nut).


21 Dismantle the sensor’s holder and turn screws, U-profile, lock washers and wing nuts on outer side.

22 The standard mounting height for T-Rh sensor is 2 meters above the ground, therefore we recommend the installation of the system on 2 poles - on top of first self-cleaning mechanism will fit and on the second you will mount solar panel on the top of pole and T-Rh sensor right under.

23 In case of single pole mounting, you will use connecting bracket for solar panel fixation.
When fixing self-cleaning unit on the pole you will attach connecting bracket to the lower U-profile.


Remove all screws, lock washers, nuts and U-profile from solar panel holder and attach solar panel holder to connecting bracket.

For connecting the solar panel you will use short mushroom head squared neck bolts, lock washers and wing nuts.


There is another option for solar panel instalation – you can attach it from the other side if you attach connecting bracket directly to metal holder for self-cleaning mechanism.

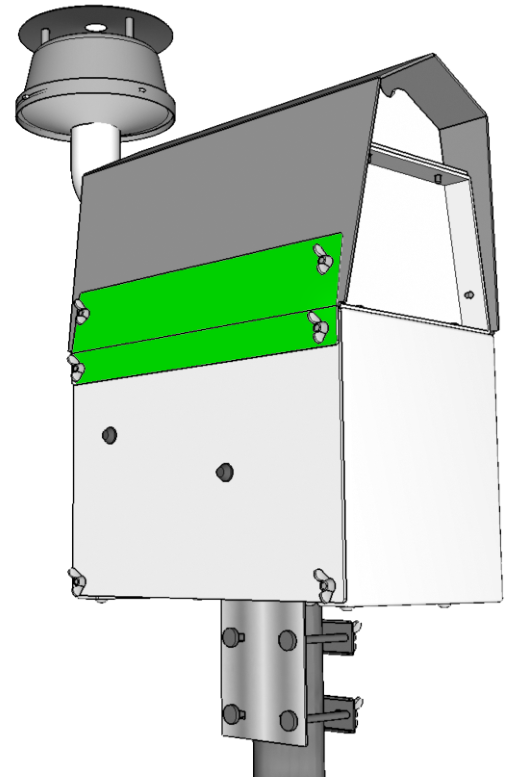
Stripe for preventing insects escapes
Some models include also a stripe from green corrugated polypropylene (the same material as for the roof) - fix it over the roof and self-cleaning box to close the narrow opening, which sometimes appears between upper and lower self-cleaning units and thus prevent possible insects escapes.