How to start device
1 Remove the glass cover from the device (use a screwdriver to remove it gently).
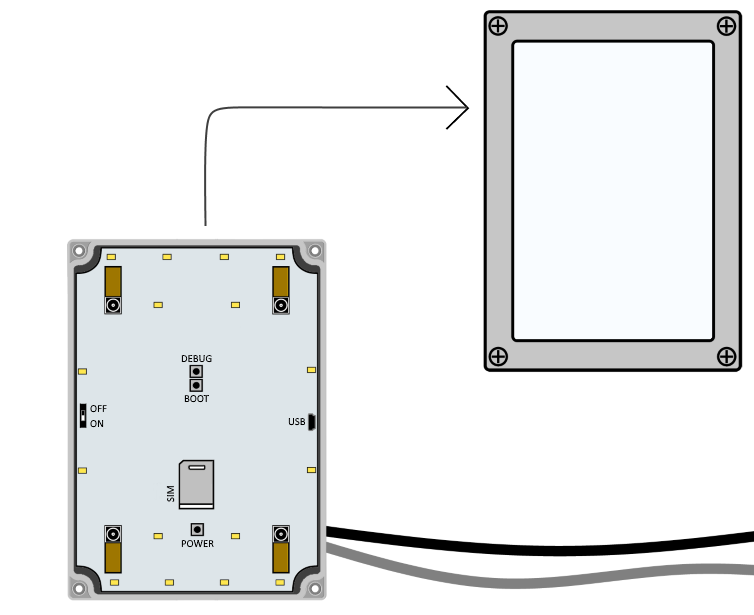
2 Insert the SIM card in the appropriate place on the device (SIM).
3 Turn the device ON (ON/OFF switch).

4 Screw the glass cover back on the device.
5 Place the device into the appropriate housing.
6 Finally, close the housing and find an appropriate place to hang up/fix the trap and place its solar cell (and other add-ons).
The next day you should be able to see a photo sent from your device in the web application (it takes one picture per day if you haven’t set any additional capture time).
If you can’t or don’t want to wait till the next day to see the first data sent from your trap, you can start it in this way: All steps are the same, but the step no. 3:
Turn the device ON (ON/OFF switch). Be sure that no lights are blinking – in case they are, reset the trap: turn it OFF and then ON again.
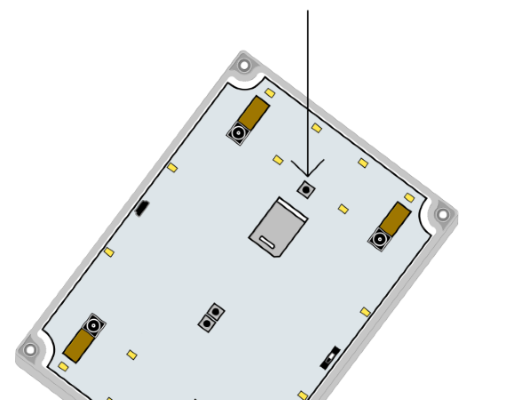
Hold the “POWER” button for few seconds:
If you hold the “POWER” button till all the led diodes light up, the device will start taking a photo in few minutes (each camera takes it’s own photo separately, so it will take 4 photos).
If you release the “POWER” button after the first or first two rows of the led diodes light up, it will send a telemetry in few minutes.
In both cases you will see the “OPERATE” light blinking – it shows that the device is operating. In the web application you will see a circulating icon - shows that the trap is sending data.
Count that it takes a little bit longer to see the picture (telemetry) sent in the web application. In some cases it can take almost an hour.