Monitor
When you open Monitor tab, in the head of it is the name and serial number of device, the name of pest which you are monitoring with selected device and location of device.
If you have a device with 4G electronic you have the cogwheel next to the name of the device, where you set parameters of the device. How to set parameters of the device will be explained in the chapter Single device settings.
Under this tab you find the trap details view:
Dossier
The next is a dossier where is gallery of images, chart of battery voltage, signal strength, pest chart and weather chart.
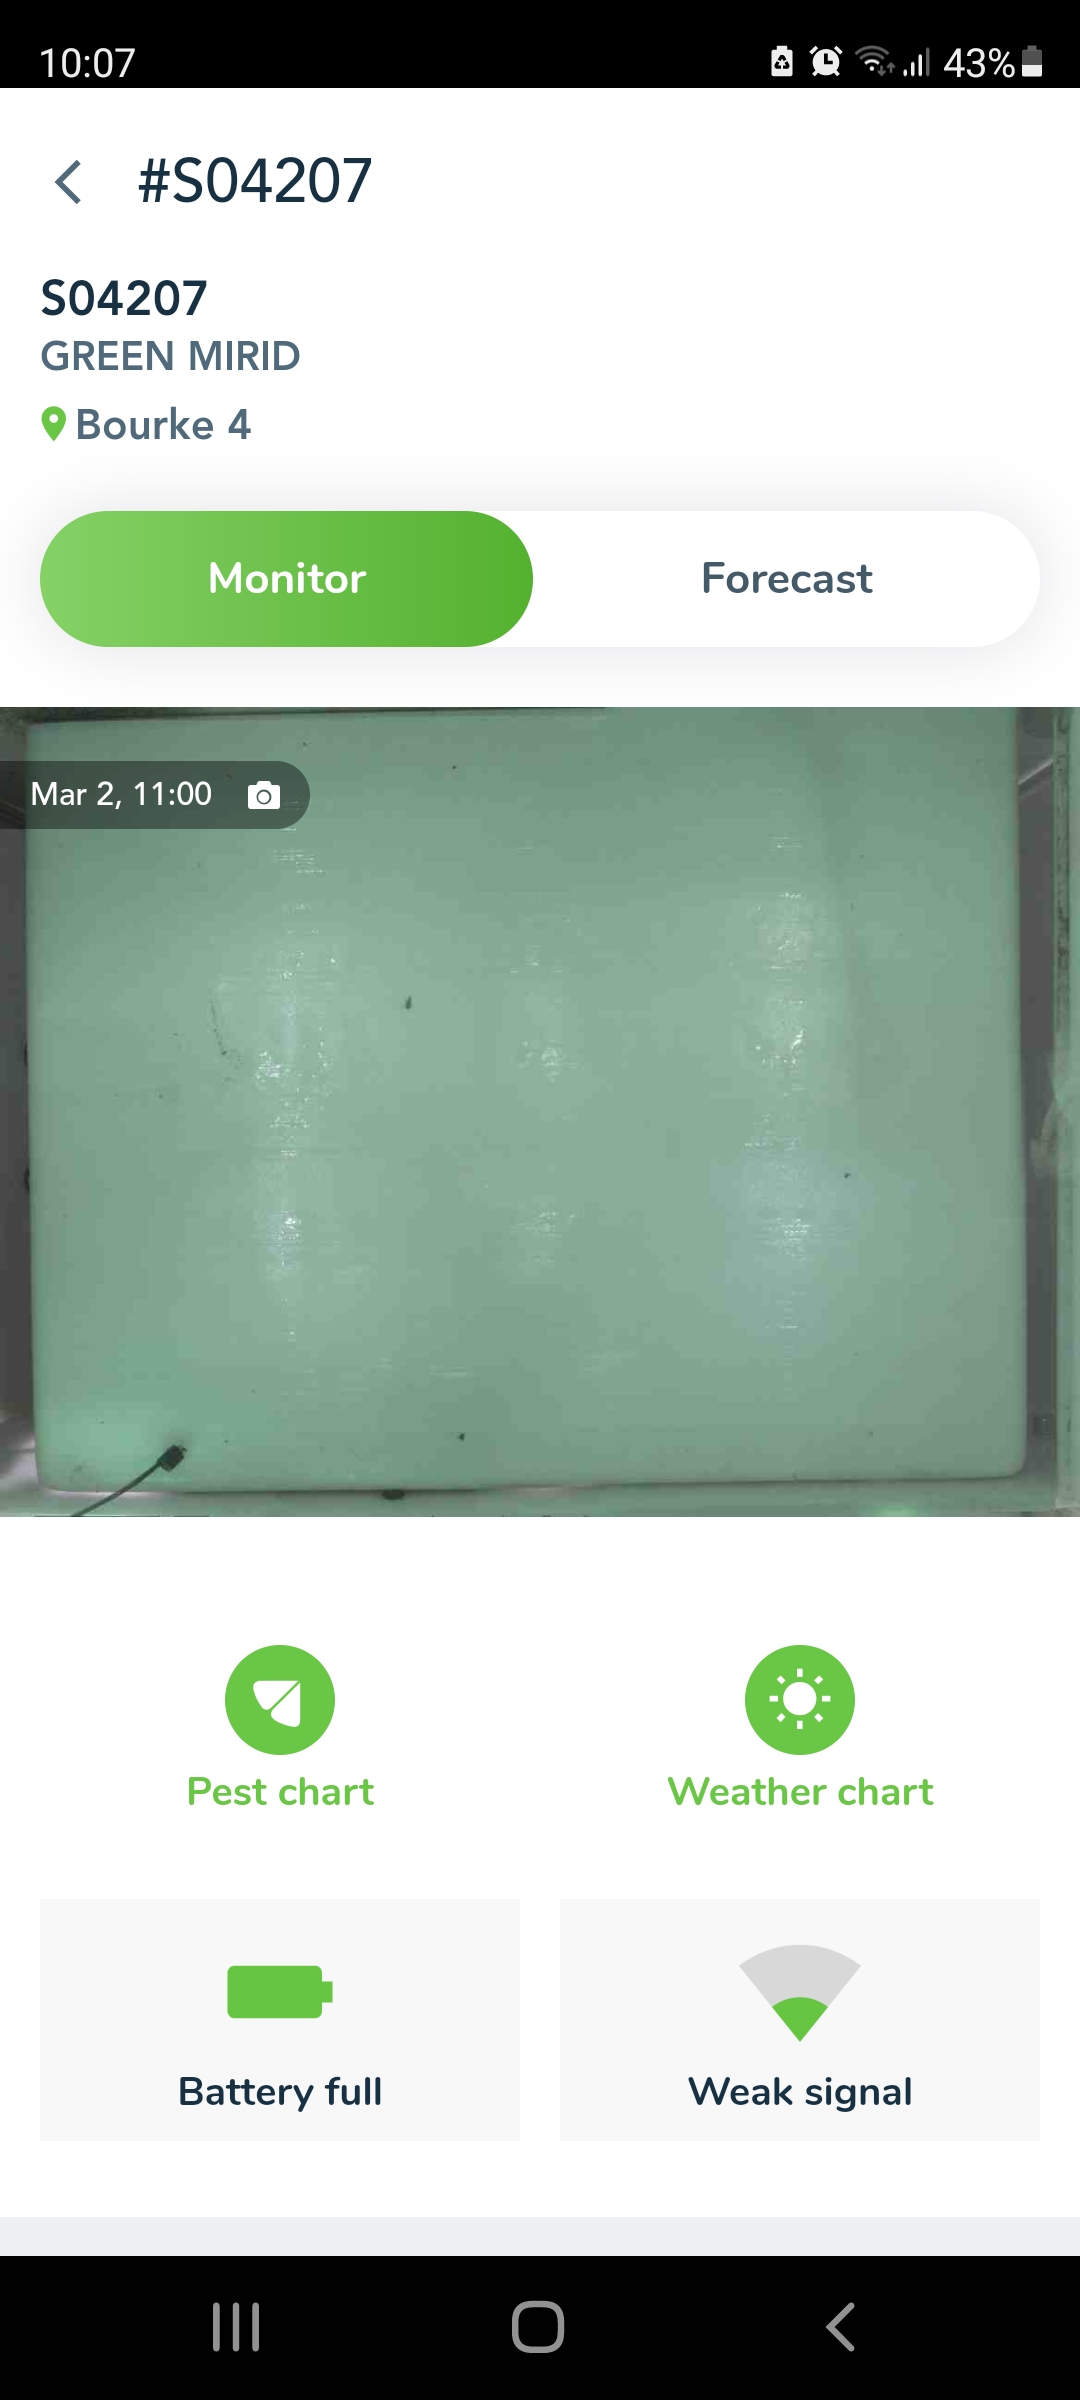
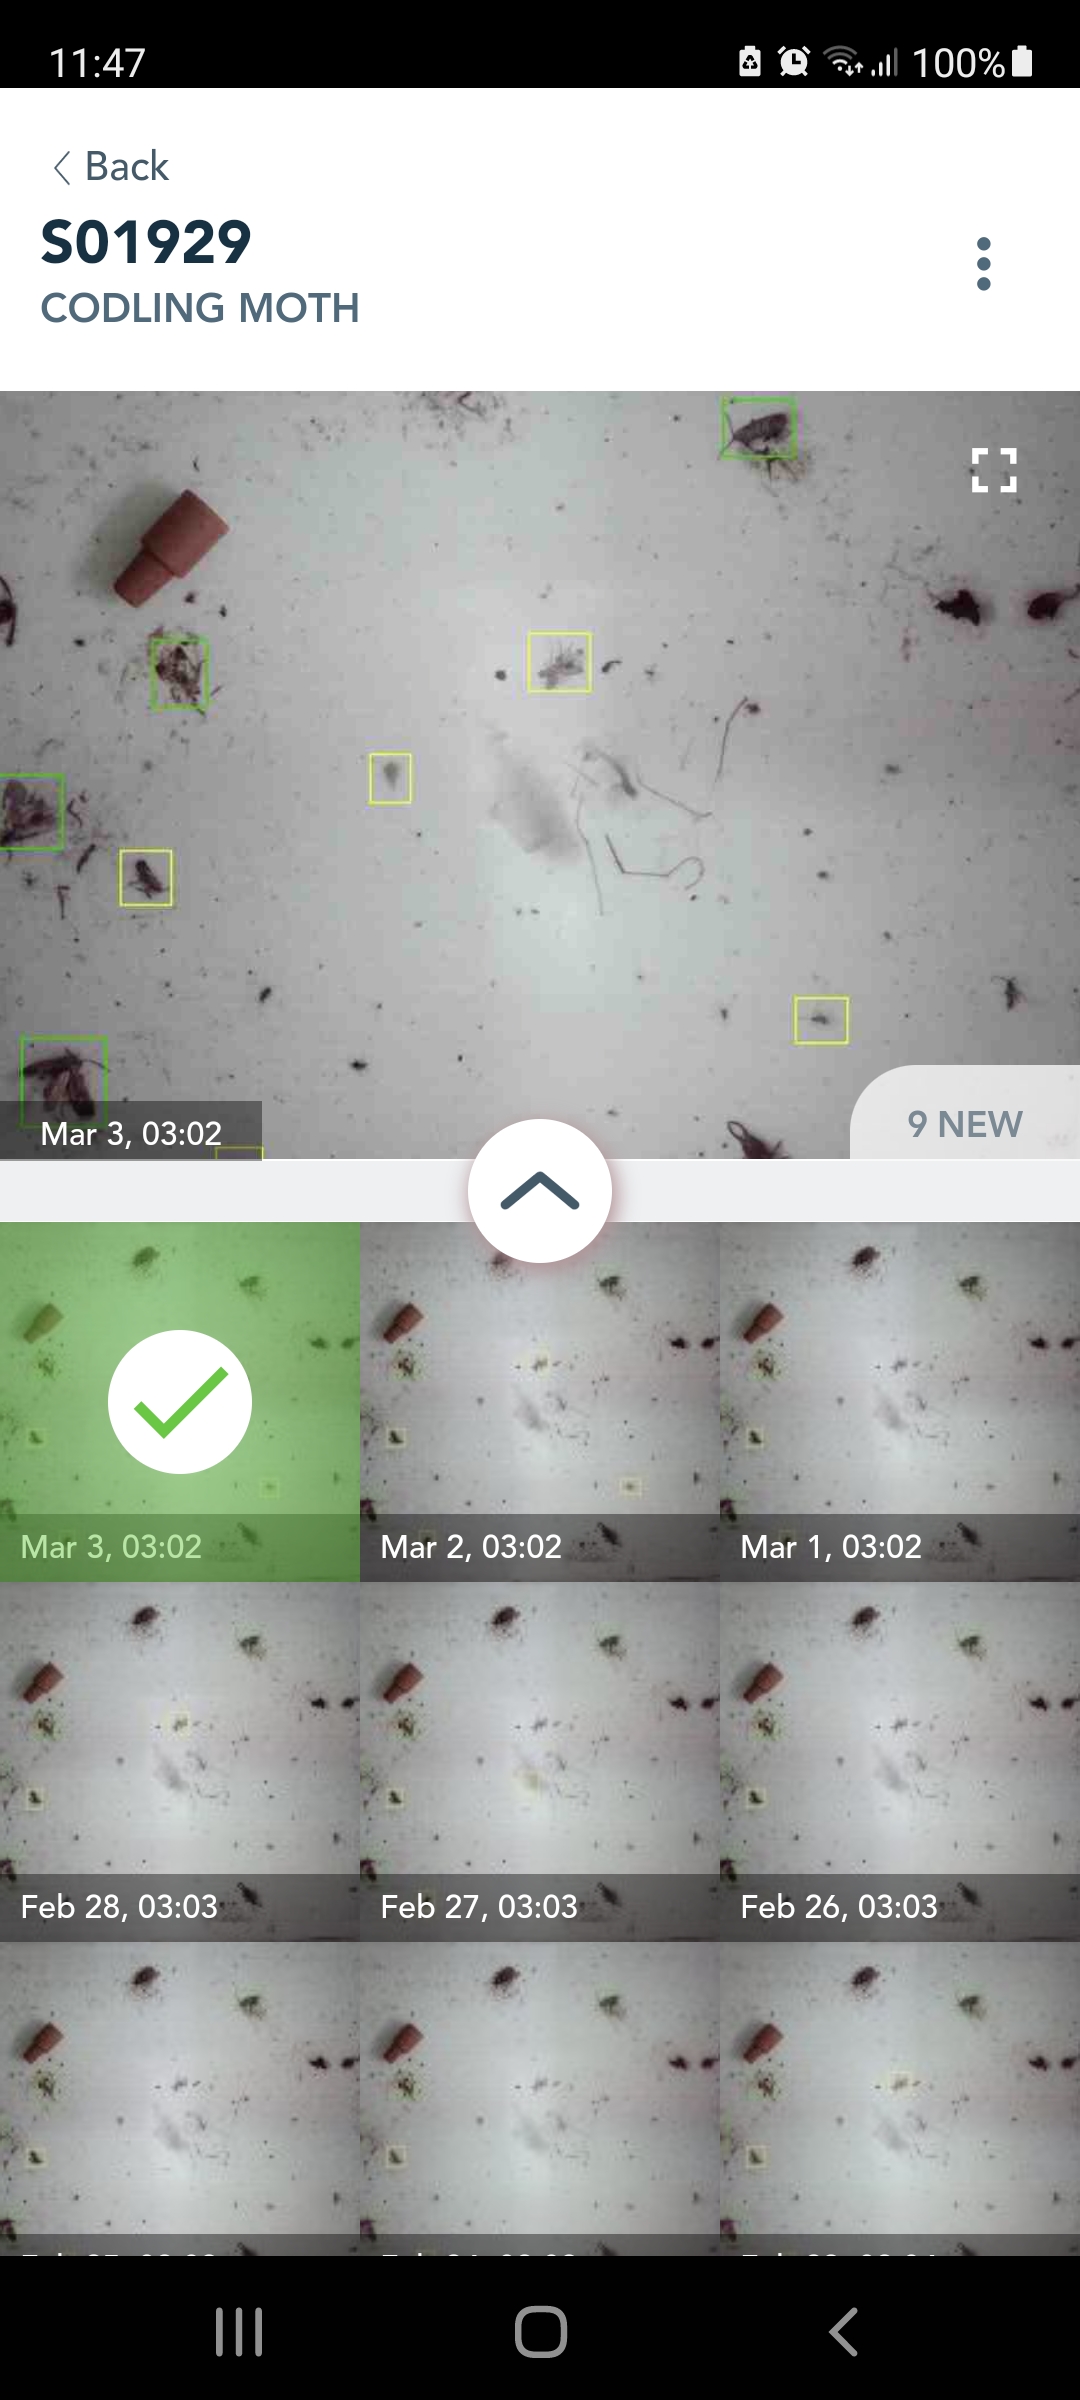
Gallery of images
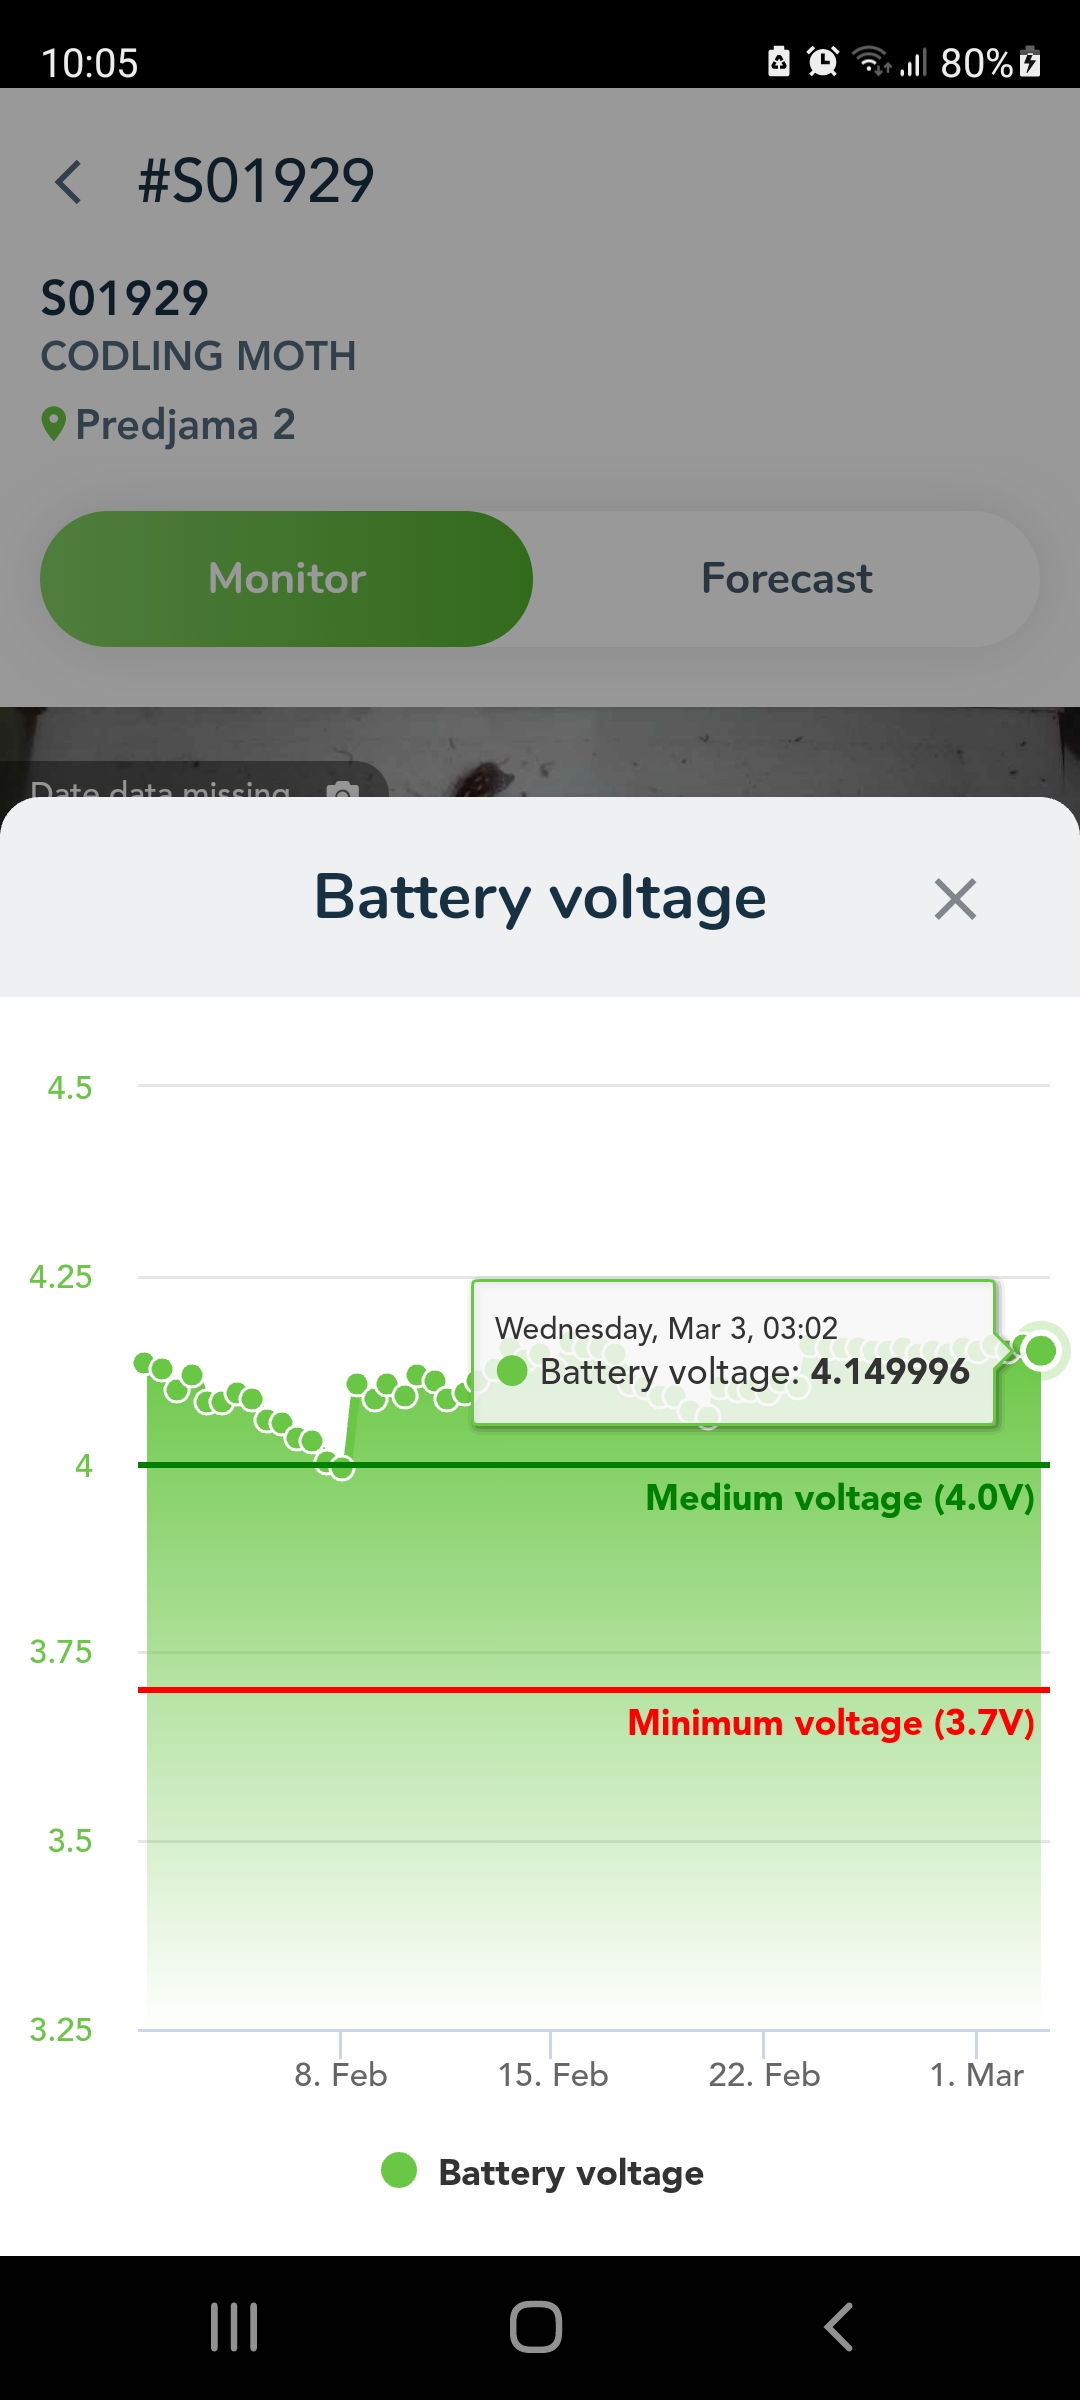
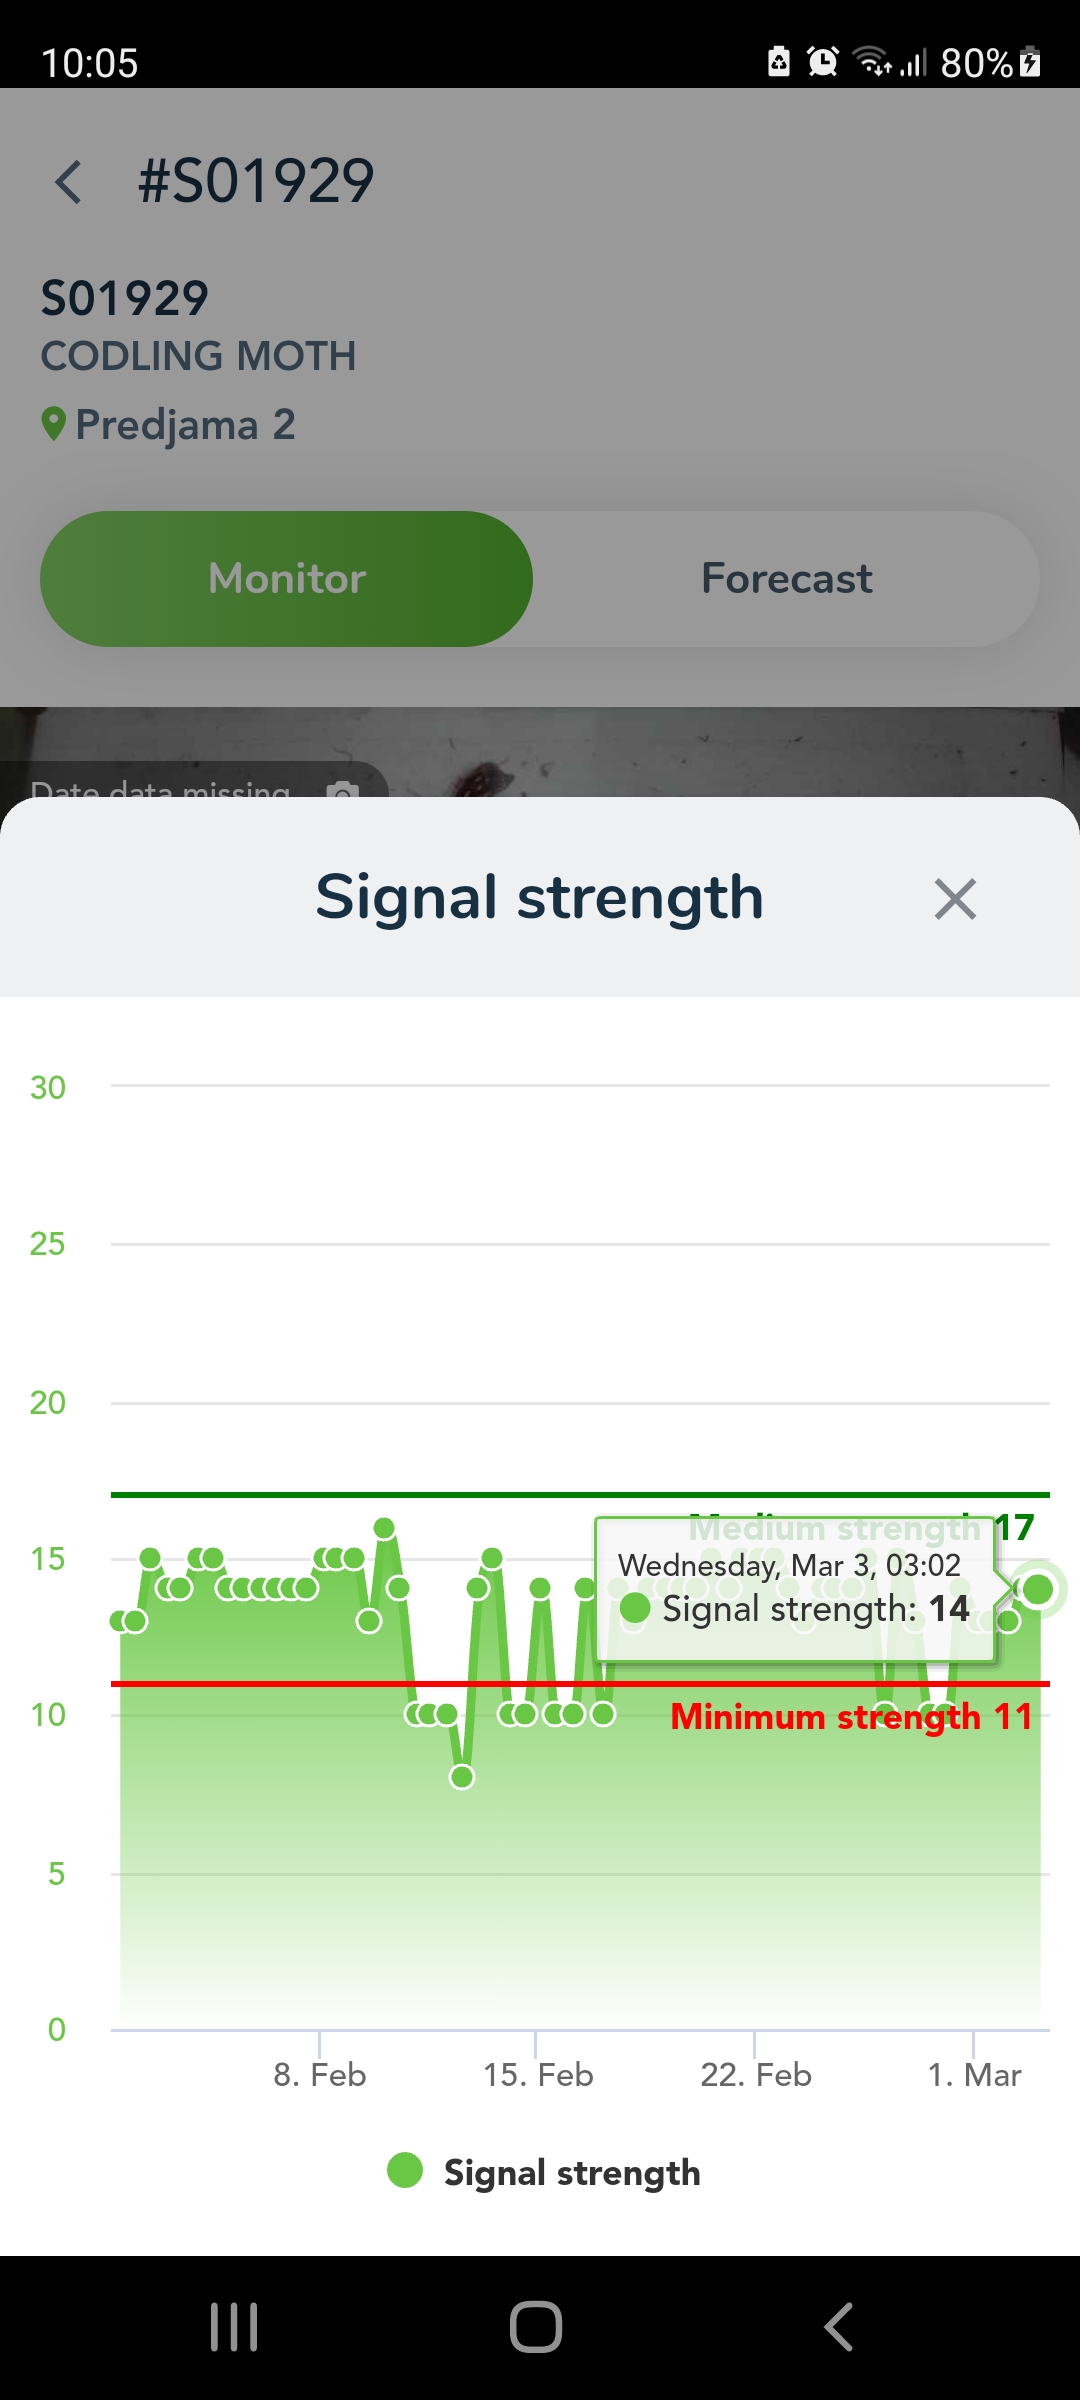
Battery and signal level
By clicking battery icon a new popup window will be displayed with detailed data chart of devices battery level history. By clicking signal icon a new popup window will be displayed with detailed data chart of signal strength history.
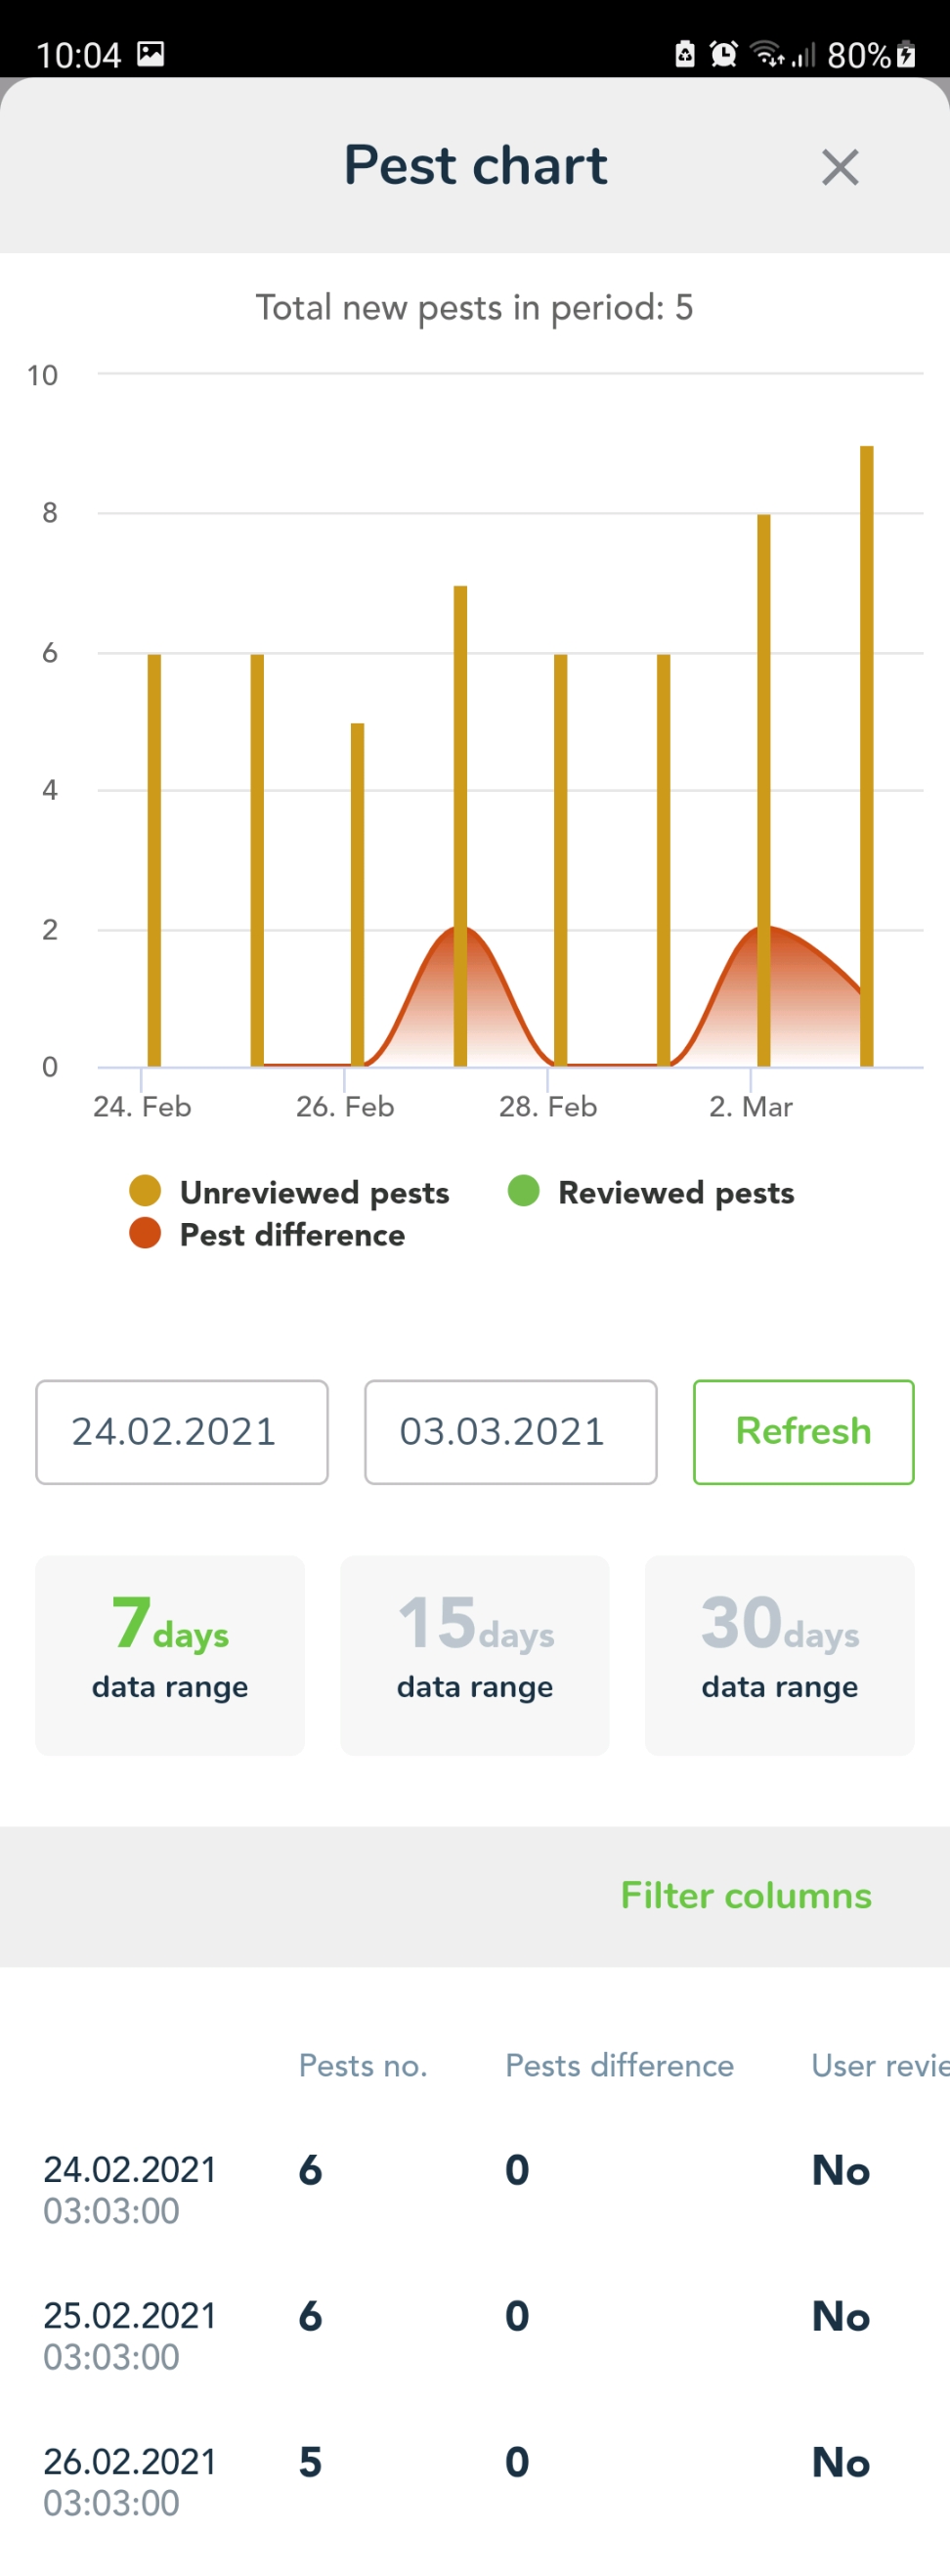
Pest chart
Orange bars represents the number of pests detected automatically, green bars represents the number of pests reviewed by user and the red area represents the difference of the pests caught by day. There are also some events visible on the graph - they are marked with vertical dotted lines (like sticky roll tweak in pink, change of sticky plate in red, spraying in blue). You can choose various data ranges from 7 days to 30 days or you can choose the preview for the period between two dates. Under the chart is the table with more detail data about pest chart.
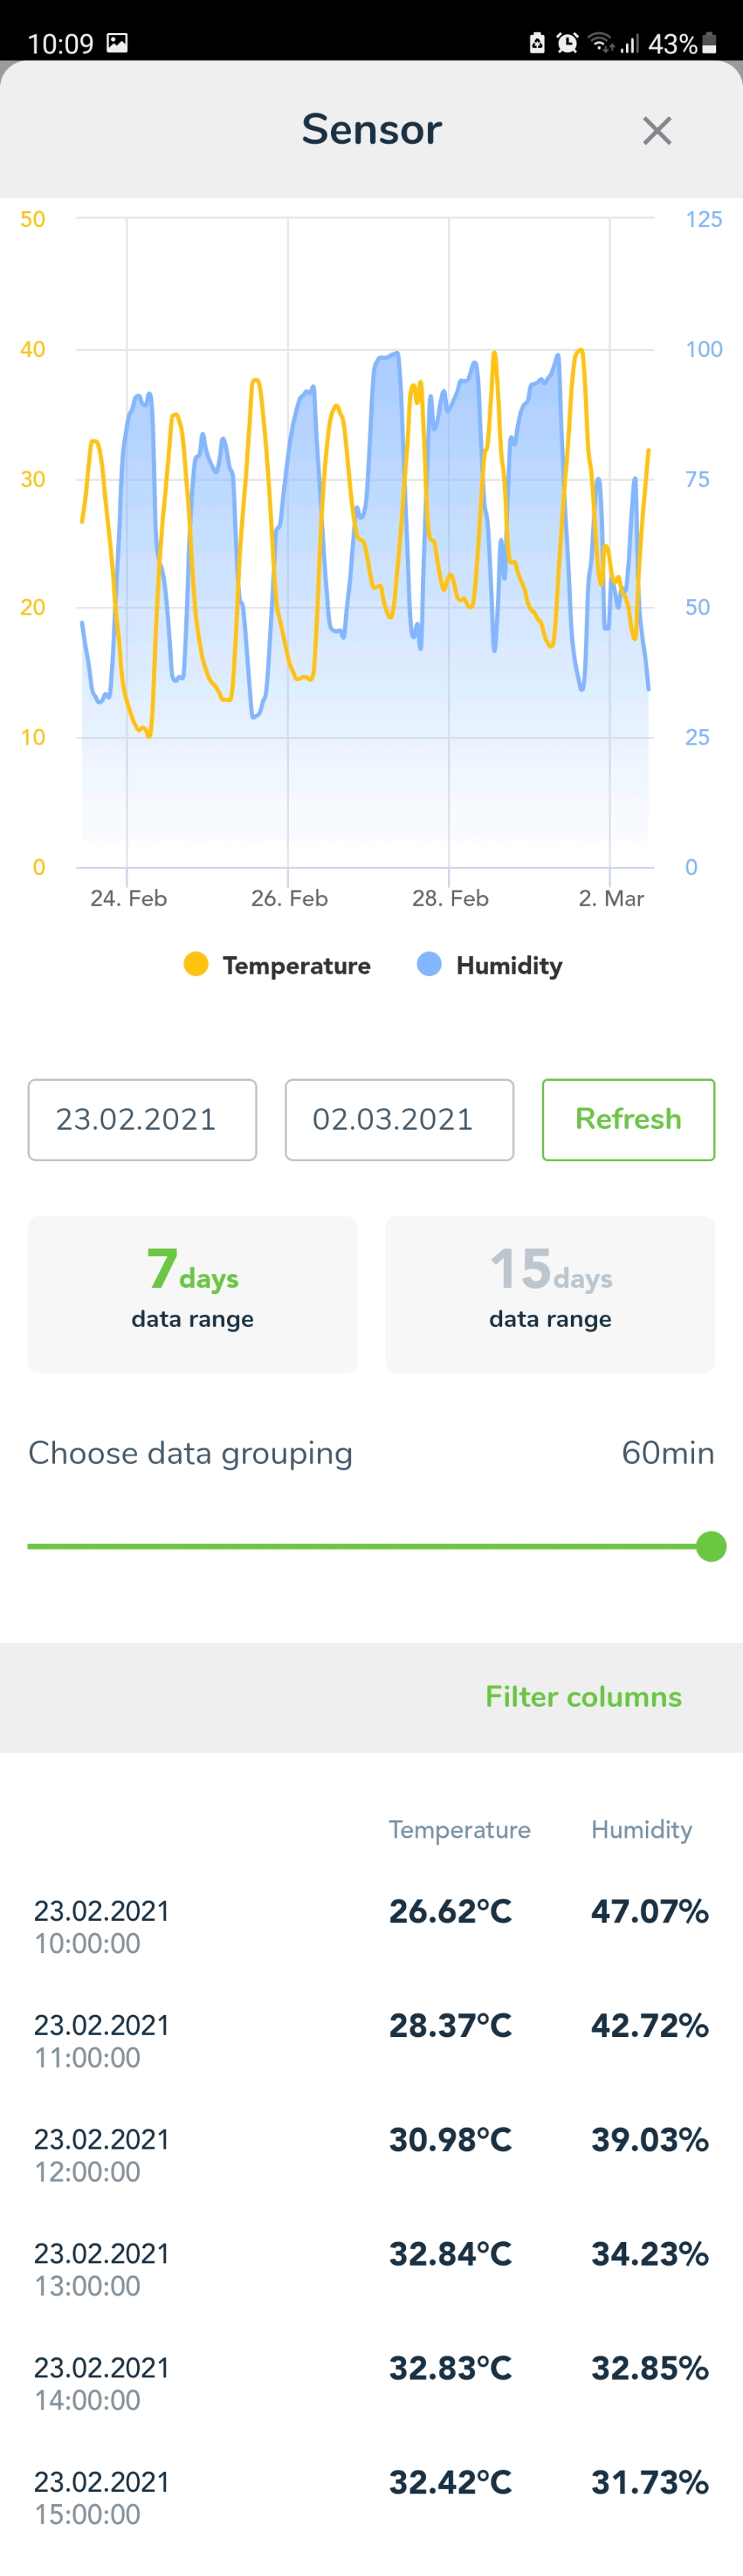
Weather chart
The weather chart is optional - you can see it if selected trap has the temperature & relative humidity sensor.
Blue bars represents relative humidity, the orange line represents the temperature. You can choose the data range to be shown (from 7 days to 15 days) or you can choose the preview for the period between two dates. Choose data grouping which shows in the table under the chart.
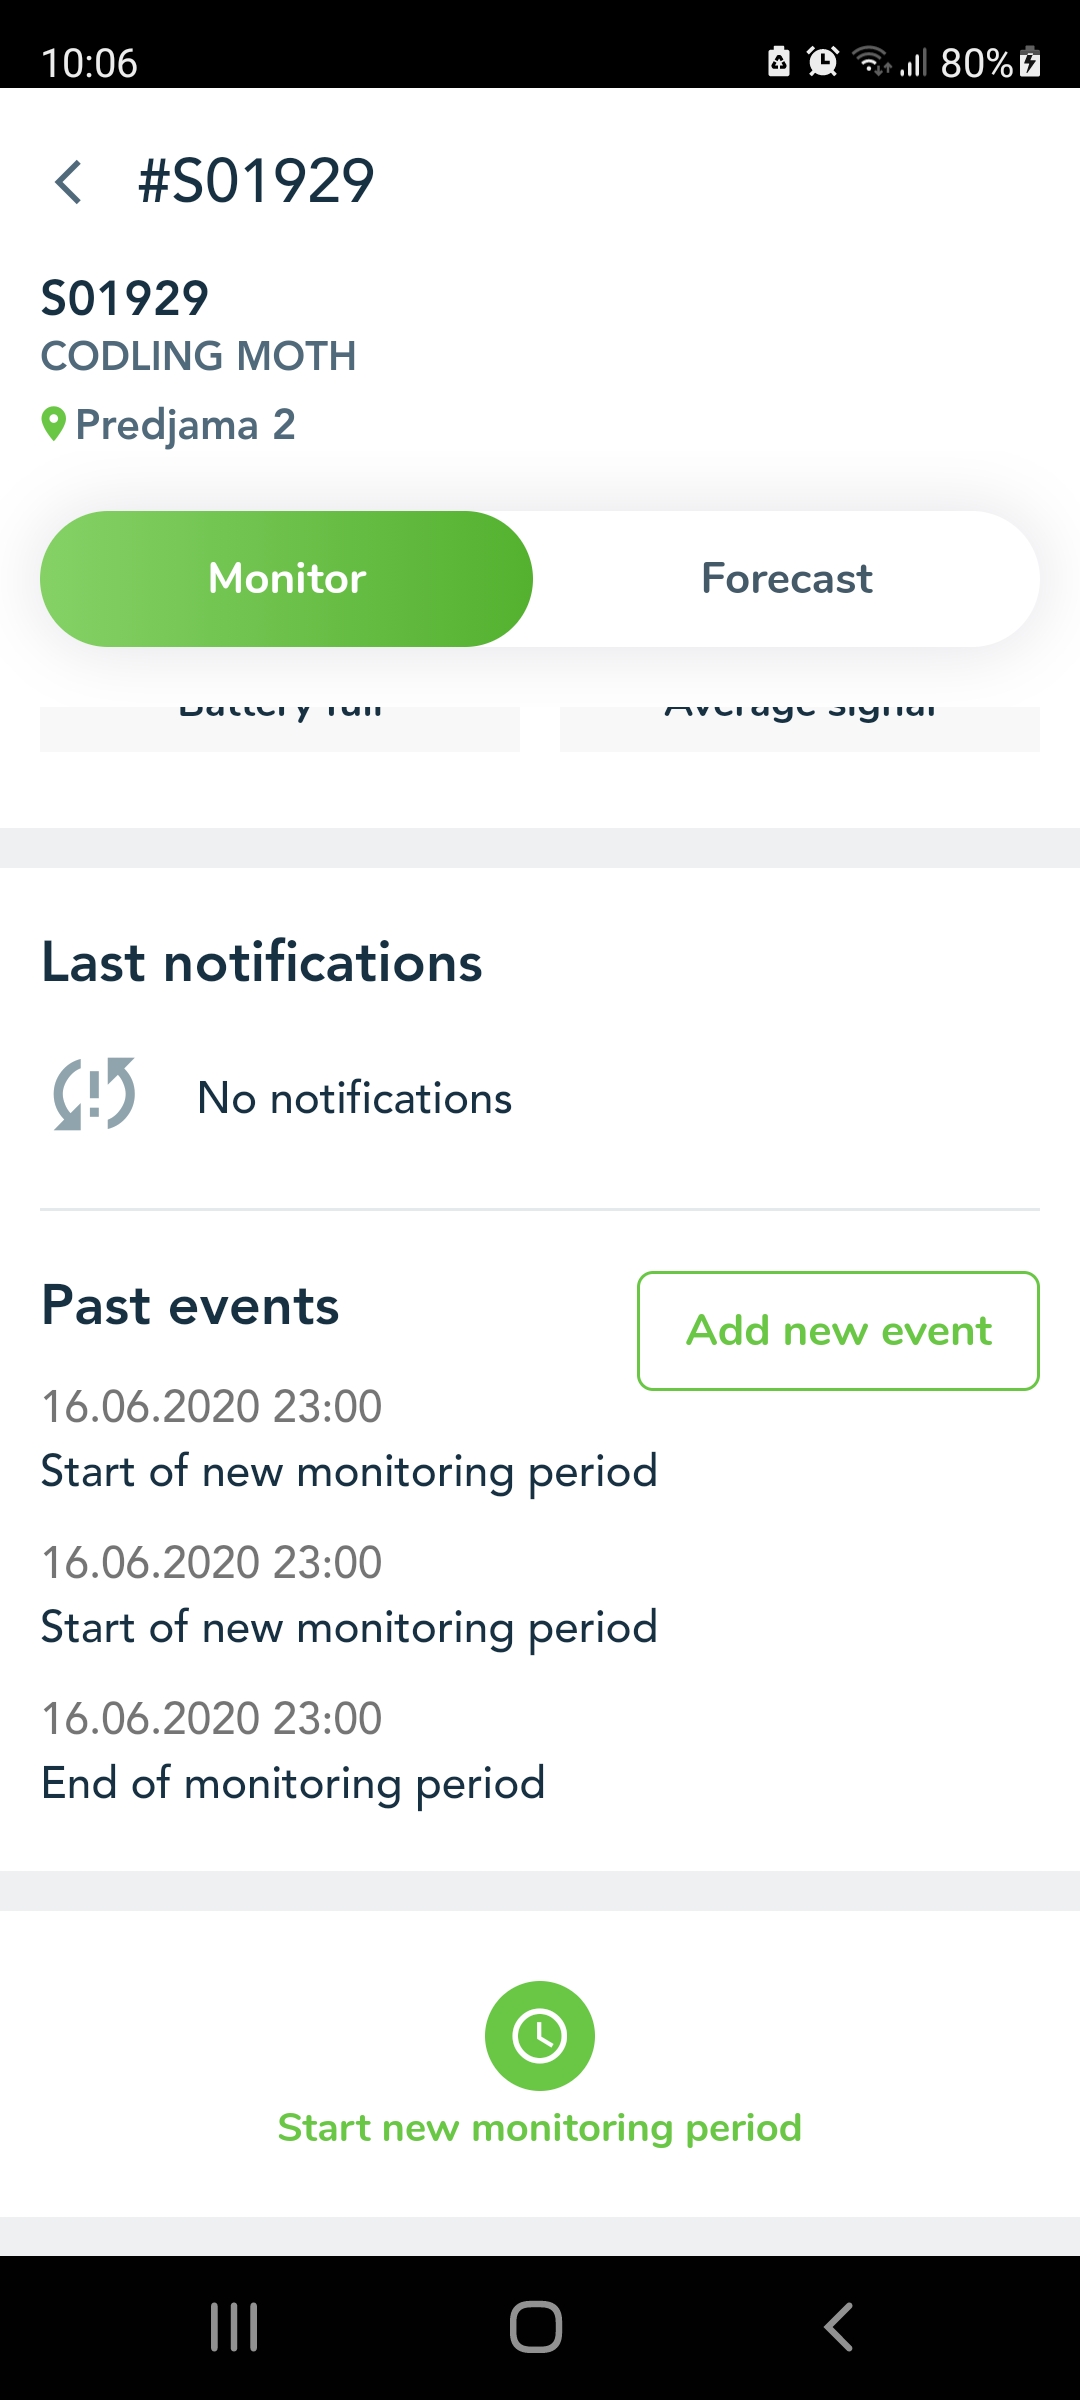
Past events
Under Past events is the list of past events which happened on the device (start new monitoring period, end monitoring period, sticky roll tweak, replace sticky plate …). If you want to add new event click on the button Add new event to opens a pop-up where you insert the data to create a new event.
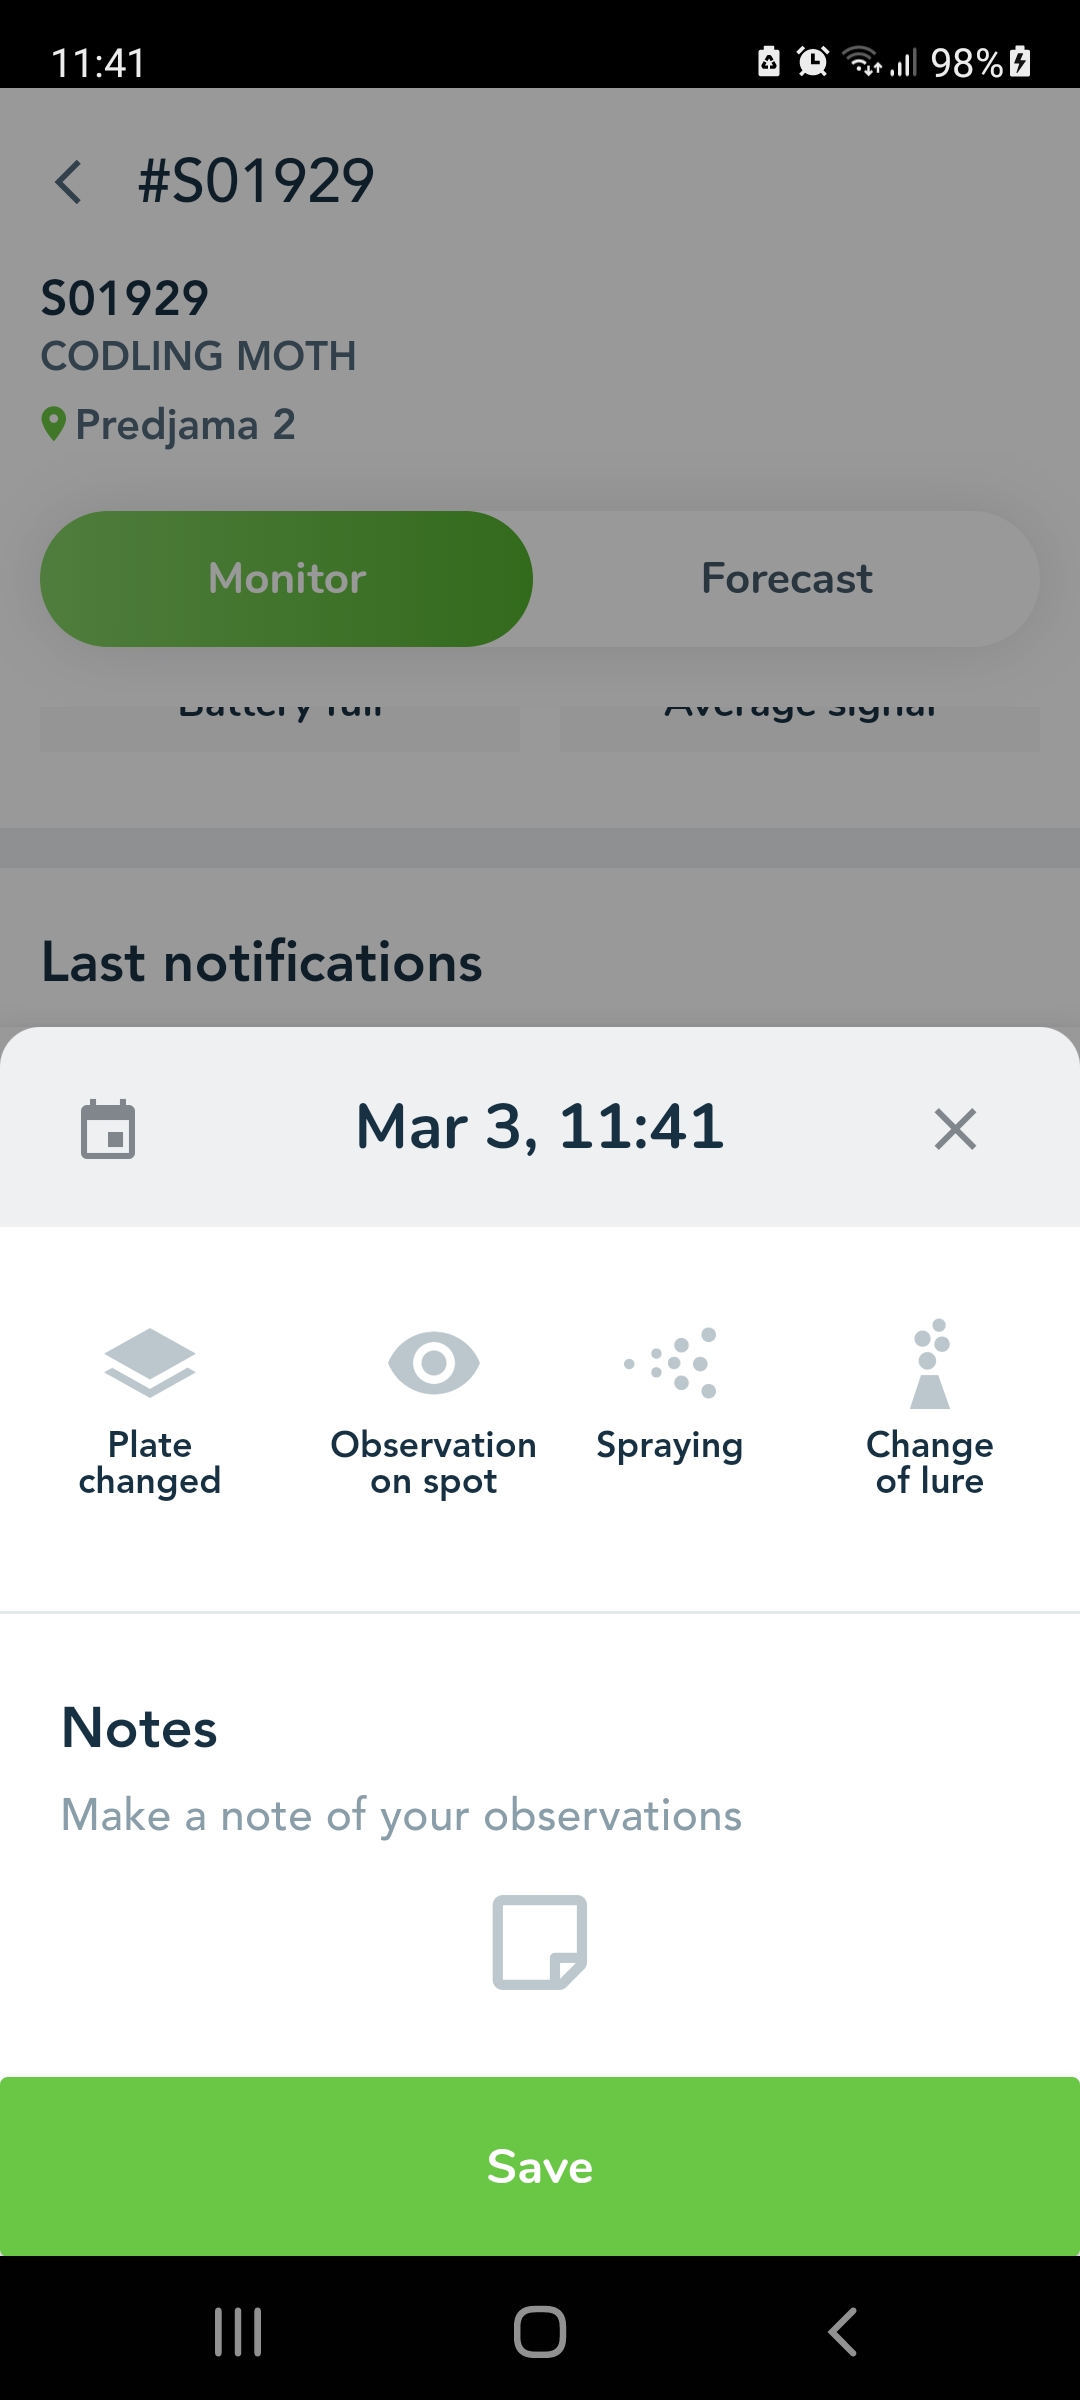
Add new event
First you select the date, on which you want to add a new event. You select the date by clicking on Calendar icon in the left corner of the window. Select which type of event you want to add:
plate change - add event when you changed the sticky plate on trap
observation on spot - add an event when you had or you will have an observation on the spot; when you select observation on spot you have the option to enter the number of pests do you observe
Spraying - when you add an event of spraying you need to enter which spray product do you use, spray effective days, spray efficiency and for which affected development stage do you spray
Notes - you can enter some specific informations about event you will create (eg log number of pests or other observations). To save the settings and add new event, click on Save button.
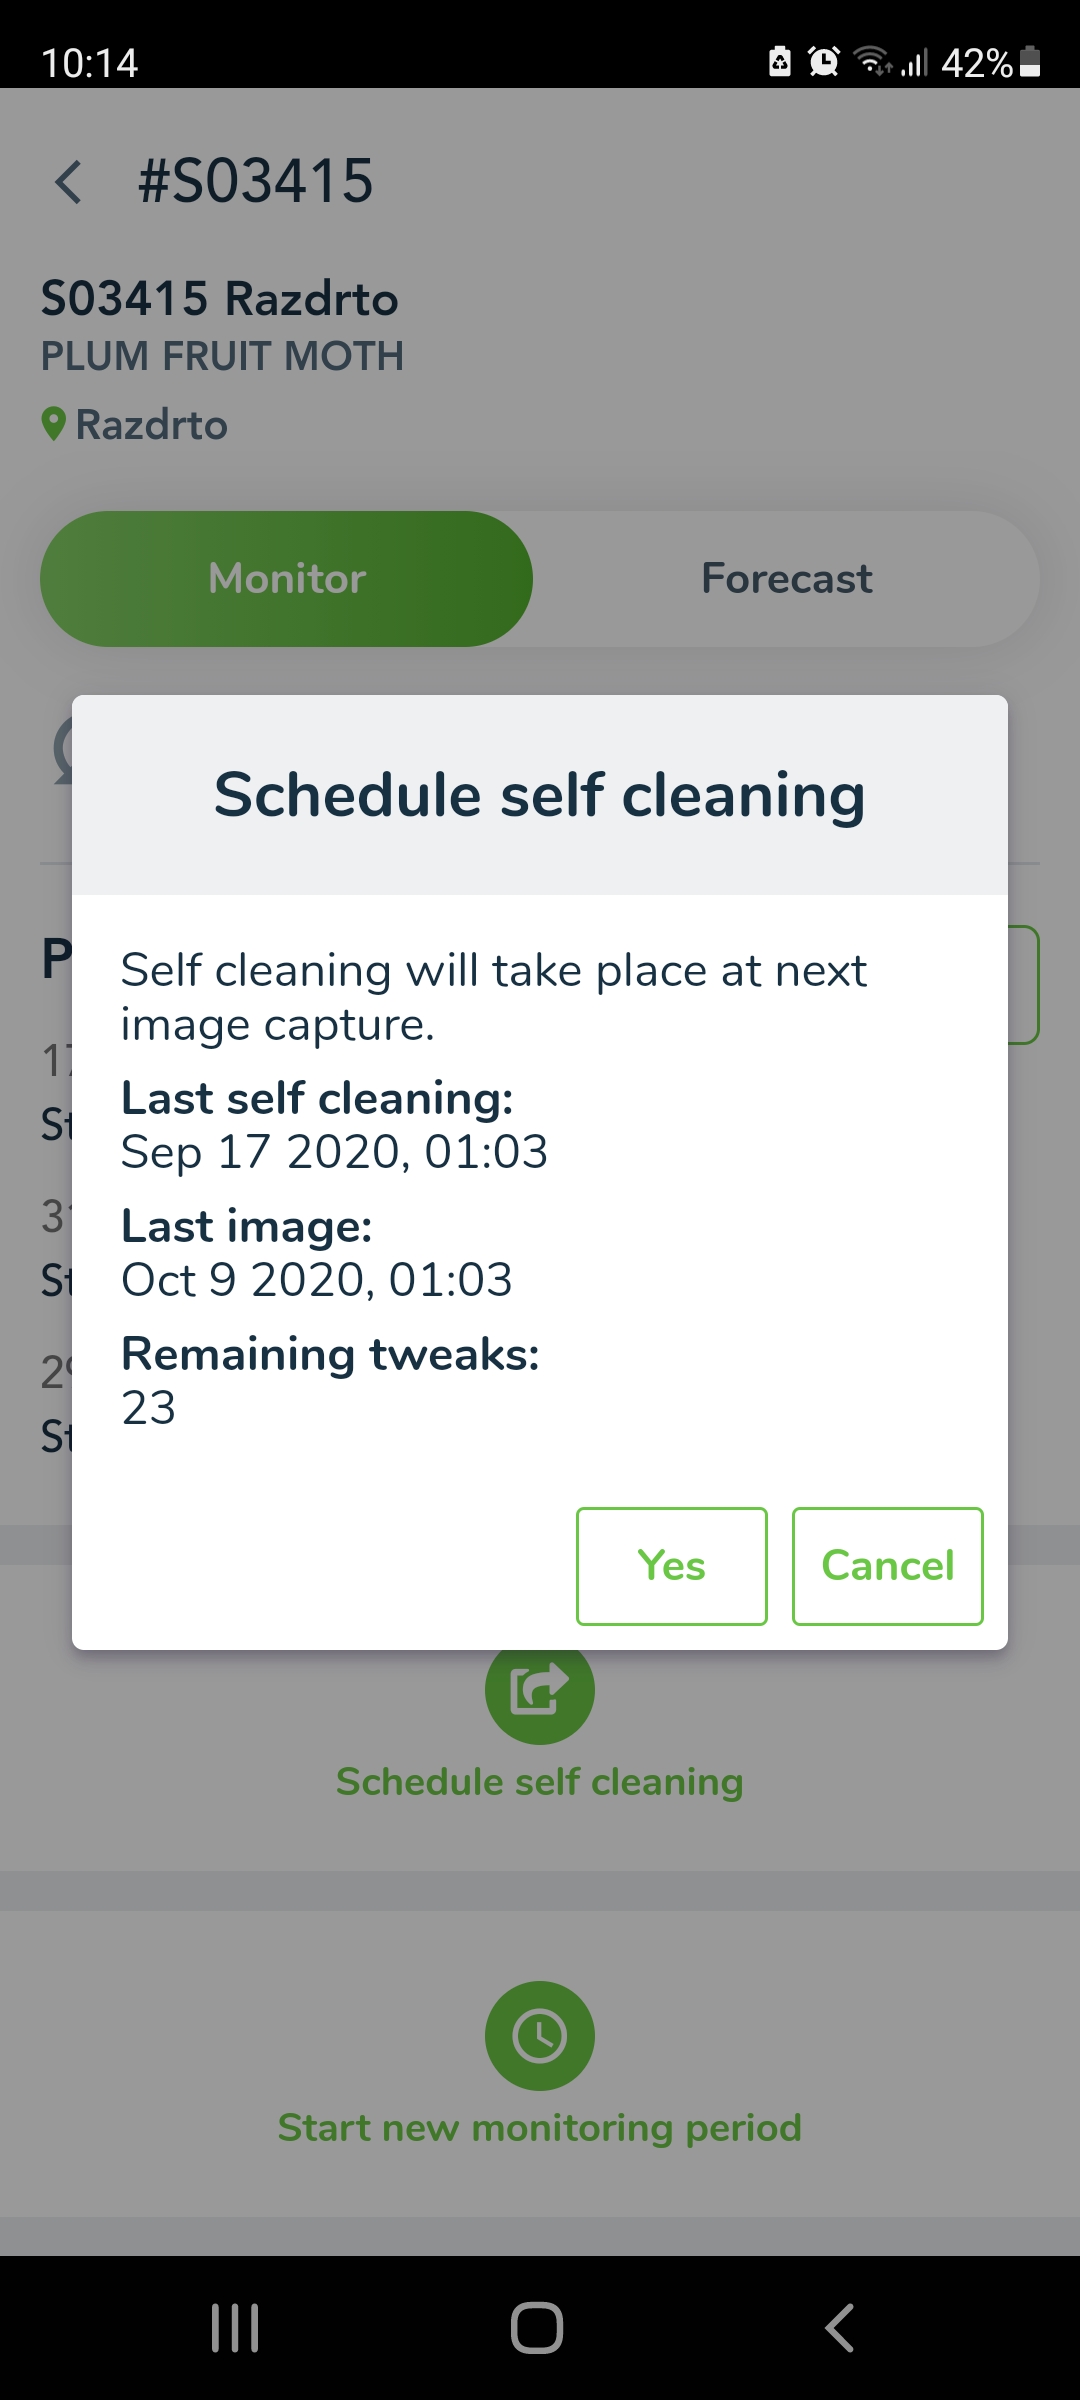
Schedule self cleaning
On the devices with self-cleaning mechanism you have the button to schedule self-cleaning. When you click on the button shows pop up where is the info about when self-cleaning will take place at next image capture. You have also info when was last self-cleaning, last image and remaining tweaks.
If you click on Yes you confirm schedule self-cleaning. If you don’t want to do it click on Cancel
Start new monitoring period
At the end of the Monitor tab is the button Start new monitoring period. When you click on the button opens a pop-up where you need to enter the following data to start new monitoring period:
Starting date - select the date of starting a new monitoring period
Description - enter a description that indicates this monitoring period
Location name - currently, you can create a new monitoring period on the current location of the trap; if this trap has more locations you can choose the location from the dropdown list.
Location details - enter the details of location
Area radius - enter the area radius in km
Pest - select the pest you will be monitoring
Daily pest pressure - when you select the pest, below it, displays the default values of Daily pest pressure threshold for low, medium and high levels; you can change the value for medium and high levels; it must be between 1 and 1000; if you enter the value lower than 1 displays warning; medium level value always must be lower than high level
Crop - select the crop you will be monitoring
Protection measure - select procetion measure you will be use in this monitoring period
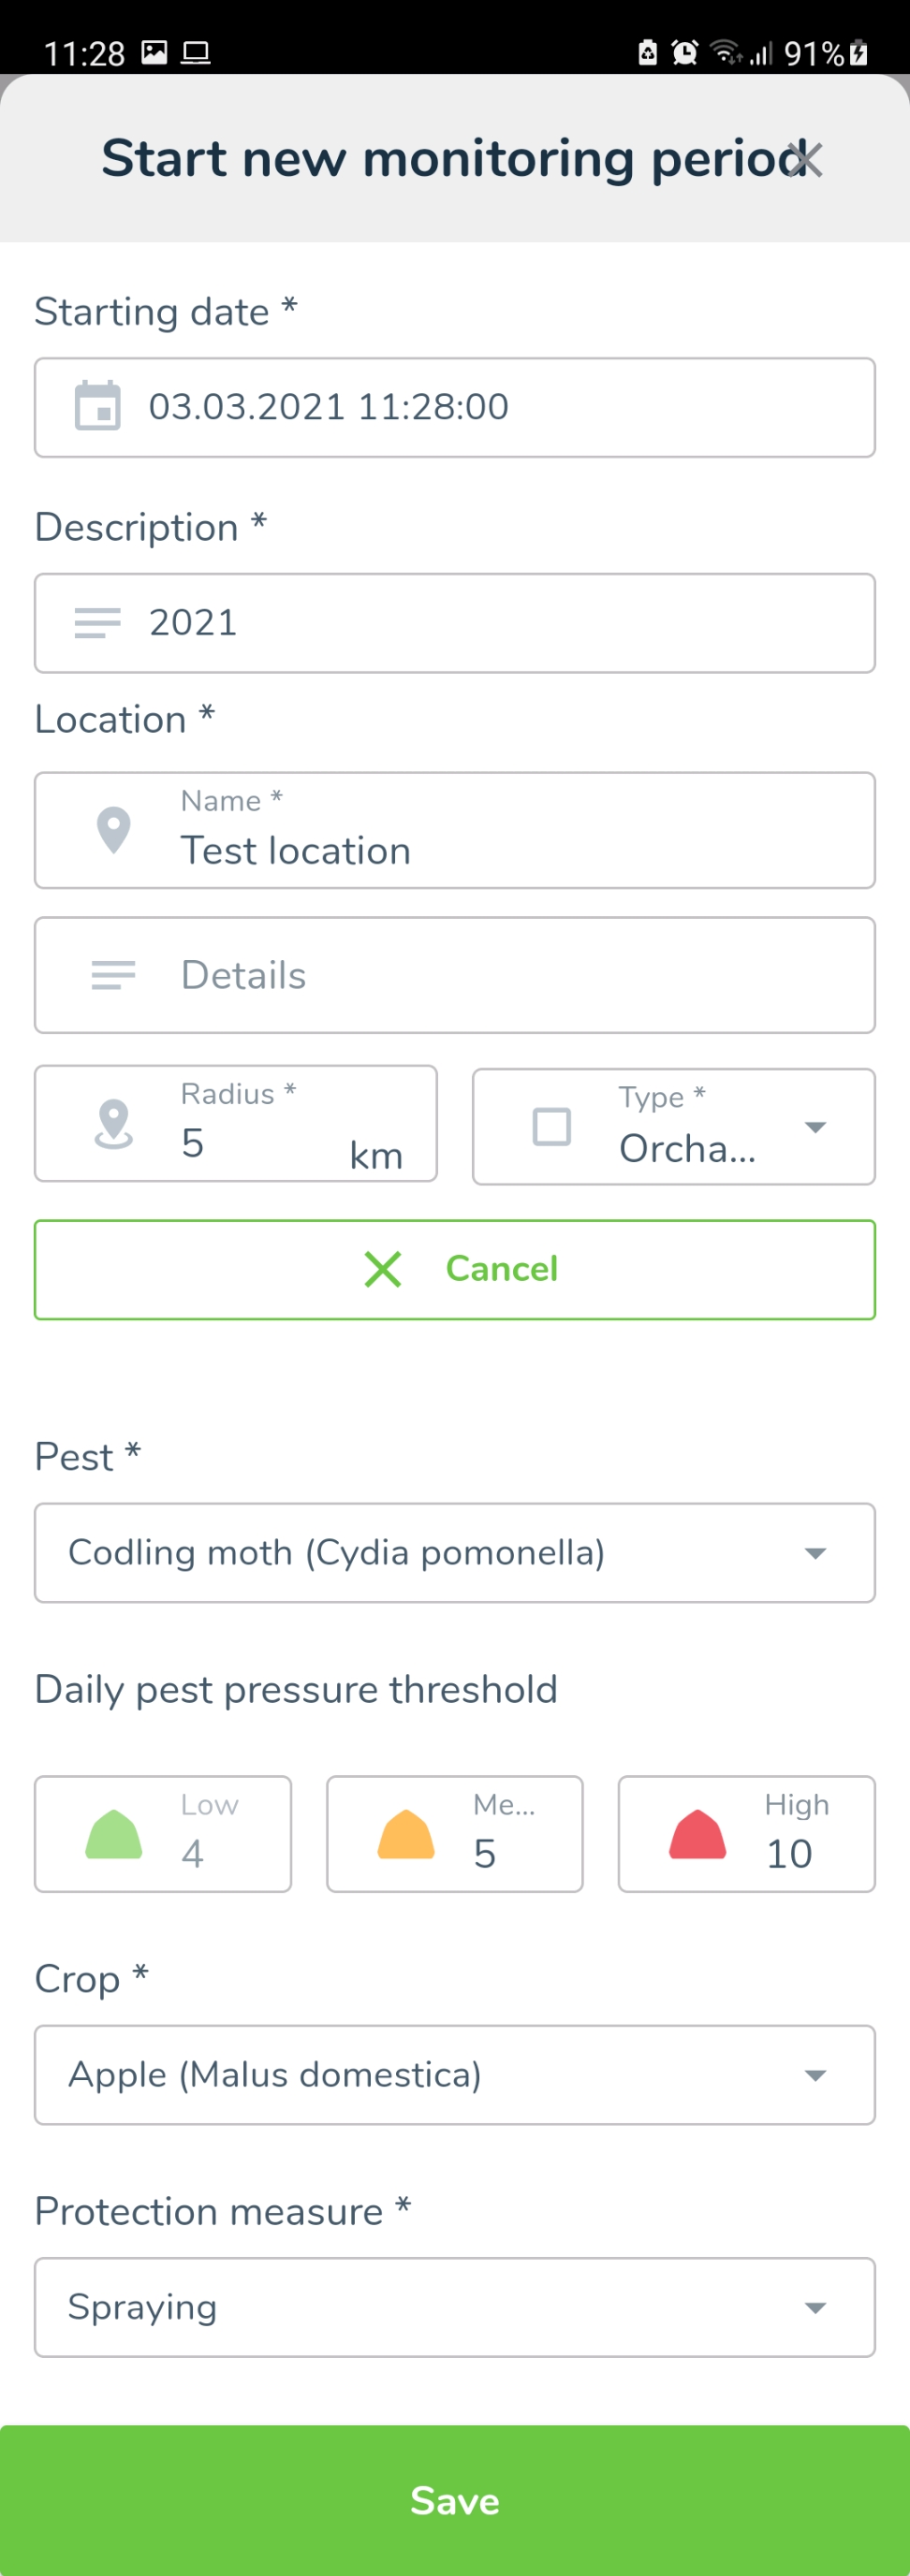
Click on Save button to save the settings of new monitoring period. Under Past event shows new event Start of new monitoring period.