Trapview delta
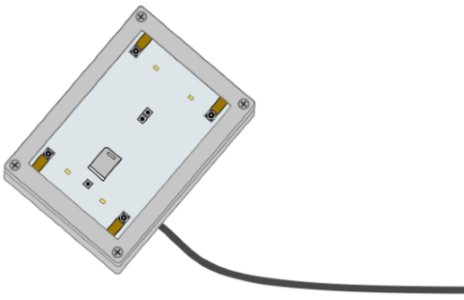
Delta trap with all the associated electronics is light enough to be hanged into the tree crown, thus the device can be used also for monitoring of orchard pests. The housing is made of corrugated polypropylene, which is light and 100% recyclable, it is resistant to mechanical damage and atmospheric influences, non-toxic and reusable for several years. In case of damage it is possible to move all the electronics into a new housing and vice versa.

All components
1 Housing

2 White insert

3 Device
4 Solar panel with holder

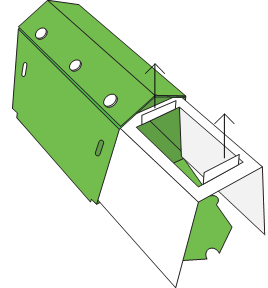
5 Pawl locks

6 Wire

7 Sticky plate

How to assemble the trap
1 Take the housing – imprinted numbers facing up.
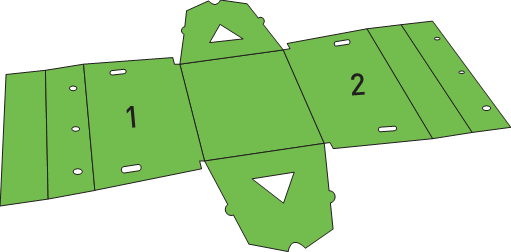
2 Lift both sides up.

3 Fold the side with no.1 imprinted like it’s shown on the picture.

4 Fold the second part.

5 Take one pawl lock and push it in the hole through both layers. Press as much as possible.

6 Repeat the process and insert all the pawl locks. (All 3.)

7 Close one door.

8 Take the white insert.

9 Fold both sides down.

10 Put the white insert into the green housing. Lift the two tabs up. (See the arrows.)
11 Unscrew glass cover from electronics housing, insert SIM card and turn the device ON (ON/OFF switch) and fix glass cover back on electronics housing.

If you can’t or don’t want to wait till the next day to see the first data sent from your device, you can start it by following the manuals in chapter How to start device.
12 Put the device between two tabs, facing down. (Be sure it fits well.)

13 Push all together inside the housing.

14 Place one sticky plate (remove the protective foil, place the lure on it) on the bottom of the housing with the sticky side looking up.

15 Close the door. The cable should go through the little hole on top of the door.

16 Place the wire through the little holes at the top of the doors to hang it up on a tree.

17 (Place the solar panel into it’s holder and) screw it on a pillar.

18 Hang up the trap in an appropriate place in a crown, and place the solar panel on a pillar so that it will be exposed to the sun as much as possible.
